I am very pleased to show you my first video ever. I know there are a lot of beginners who don’t know where to start but also preppers who want to be better prepared. If it’s your case, you are at the right place. In this video I show you 10 things you can do right now. You don’t need to be a survival expert or a super survivalist. Everyone can do what I say in this video. Start prepping today and live better tomorrow!
Most of the people who are in a survival situation, do not think about hygiene at all. But the main point is that it is really important because if you keep your body clean, you can avoid all the diseases and infections. These ailments can kill you or make your life tough in that situation. Another thing to note here is that making through the survival situation is not that tough as you might think. Importantly, you would be requiring your material used in usual survival activities like grease, ash or animal fat.
Making soap in survival situation
One of the most common way to make a cleaner is to mix wooden ash into grease. This method is really quick and easy to make. The only problem here is that the cleaner which will be formed can be used to clean kitchen utensils, tools etc. and is not suitable to use on human body. So if you want to create homemade soap while using the common material you find in the wilderness, follow the below mentioned steps
1. First you have to start with removing pearl ash (which is a purified version of potash) or potash itself, which are basically different forms of potassium based alkali present in wood material or plants. You can do this by leaching. Next you need to make a container having small holes present in the bottom
2. Form the first layer by placing small gravel. This layer will form at the bottommost part of the container
3. Then above the layer of gravel, place sand or straw. Basically the use of sand or straw is because they function as a filter. Do not worry, if you cannot find them, you can use any kind of filter
4. Now you would have to fill the rest of the container with the ashes. These ashes have to be of a cooled campfire which makes it easy to obtain.
5. Now you have to place a cooking container below the first container so that you catch the runoff.
6. Start now with pouring about a gallon of water onto the ashes. Doing this will allow the brownish-grey water (also called lye) to pass through the hole present at the bottom of the container. Then it will pass on to the second water underneath the first. You should pour slowly, like 2, 3 ounces in a minute. Do note that if the ashes have started to swim, then you should slow down the pace of pouring. During the leaching process, if you notice that lye is losing colour, then you can add more ash too.
7. After this boil the lye water using the cooking container. It should be done until half of the water has been evaporated. The mixture thus formed may froth or foam. Small bubbles will also rise from the sides of the pot. The solution thus formed is called potassium carbonate or potash
8. Now add grease, animal fat and half a cup lard to the boiling mixture and keep cooking for about 30 minutes. Note that if you are using animal fat (which could be the case if you are making soap in the wilderness, and that is the most easily available option) then do ensure that it is free meat, blood or food particles. But if the animal fat is not pure, then it may spoil the soap in the drying process.
9. Now it’s time to place the mixture into molds. Do not worry about the shape of the mold as it does not matter. You can use a deep dish or wooden mold carved from tree wood would also do. Large mold can also be used and once the soap is hardened, cut the bars into pieces.
10. Leave the mixture to dry for 1-2 days. After that remove the soap from the mold.
11. If you have used larger mold, cut it into pieces
12. Now you need to place the soap in a well ventilated area for about 10-14 days. If you have a lot of soap bars, it is better not to stack them up but to lay them which would help in the drying process.
Additional notes to be taken in consideration
Animal fats used in soap making process
You can clean the animal fats used in the soap making with a process called rendering. With this process you can remove all the animal meat tissue which surrounds the animal fat. Add the fats (chopped into small pieces) with cooking grease in a container having a small amount of water. Do not stop boiling the mixture until all the fats and grease is completely melted. Now remove the mixture from boiling and add more water to it. Let the solution cool overnight and the next day you will see all the animal fat solidified at the bottom of the container. That layer would be a clean layer of fat.
Softness and hardness of resulting soap
After the whole soap making process, if the resultant soap is too soft then you can put more salt on top of it. Once you do that, the soap will absorb the water and will harden it, giving it the texture similar to the commercial soaps. Another thing to consider here is that the type of water which you use in the soap making process also determines the end product. If you use rain or spring water, then it would be a best case scenario as they do not contain any acidic chemicals or metallic substance present. You can also use river water but for that you would also require baking soda or salt to harden the soap. Making the soap smell good
You can make your soap smell good by adding natural fragrances to it. For example you can use wintergreen or oil squeezed from lavender which would make the soap smell as the commercial soap. Another substances which can be used are lemon juice or vinegar which can make the soap free of any kind of pungent or undesirable smell Other uses of lye water
You can also use lye water to sanitize latrines and outhouses as it kill the bacteria and it would be quite beneficial when you are in the wilderness.
If you are not still convinced that paracord is preppers’ best friend, I am sure you will after seeing how it can be used in a survival situation. It is easy strong, versatile, inexpensive, lightweight and easy to carry with you where you go. This is why paracord survival bracelets are so popular.
Here are 5 ways how you can use paracord for survival.
1. Paracord Tent Rigging
With some paracord and know how, you can turn any ordinary tarp into a makeshift shelter.
For the full DIY, click here.
2. Paracord Snare Trap
This easy snare trapwill help you catch small game and eat in a survival situation. The instructions and tutorial will show you how to create a basic snare with paracord and sticks that will increase your probability of catching something in the wild.
Up the durability of normal pack straps by this addition of a paracord wrap. The Paracord Strap Wrap is a simple way of tidying up loose ends on your gear using various lengths of paracord. Using paracord instead of things like cable ties has its obvious advantages to any paracord fanatic.
Depending on the amount of the strap you want to cover and the thickness you want to make it you can use anywhere between 2 or 3 meters up to 15. Full instructions.
4. Paracord Bandoiler
Keep your ammo neat and orderly with this easy DIY.
It’s always a good idea to bring a length of paracord when you go to the wilderness. Lighten your pack by leaving the ammo boxes at home and hold your ammunition with this paracord bandoiler. Full instructions.
5. Paracord Rock Sling
Never run out of ammo with this paracord slingshot. This DIY backup weapon doesn’t need bullets or arrows.
The sling is one of the easiest ranged weapons you can make. Because of that, it is popular. It has been used since ancient times for hunting and even in warfare. Instructions here.
Swallowing a pill is the easiest solution for many people when they feel bad today. But it’s certainly not the best option. Why not using old remedies first?
When it comes to herbal remedies, many of us are aware of the benefits of echinacea or garlic as antibiotics, willow bark as a pain killer and aloe as a topical anesthetic and treatment for skin conditions. But that’s common knowledge compared to the insights and treatments that Native American medicine men discovered and used.
They developed a great medicine similar to yin/yang Asian medicine. This was a holistic approach to medical treatment that relied heavily on plants and their unique benefits.
You will find below a list of plants, trees, fruits and flowers that have surprising benefits as defind by Native Americans. In a SHTF situation, it is a good idea to keep some of these ancient cures in mind. I recommend you to print the article. But you don’t have to wait until something bad happens. This remedies are good for everyday needs. There are very effective and are still use today!
Honey and lime for a sore throat is a good example. Bee pollen, chamomile or mint are natural remedies that people use on a regular basis. It’s a good demonstration of the benefit of wisdom developed over centuries.
t’s hard to know how Native Americans determined which plants might have medicinal properties, although trial and error was probably one approach. It’s also thought that they observed sick animals eating certain plants and determined that those plants must have a certain property worth exploring. Since that time,scientific studies have verified the medicinal value of many plants. In fact, common aspirin is derived from salicin, a chemical in the inner bark of willow trees that was used in ancient times for fever and pain.
These medicines were usually administered via teas or pastes that were either ingested or applied externally. Sometimes the plants were eaten as food or added to food or water. On occasion, a salve or poultice was applied to open wounds. I would strongly recommend that you avoid the latter, given the risk of infection from wild sources.
I’ve omitted many of the natural remedies. There was a use for mistletoe that I came across, but mistletoe is essentially poisonous and if not used properly the results could be counter-productive, if not deadly.
I’ve also found a great deal of redundancy. It seems like everything is good for a cough or diarrhea. Rather than endlessly list plants that cure the same conditions over and over, I’ve tried to isolate this grouping to the most prevalent plants that you may find and recognize. As always, if you are pregnant, check with your doctor and do plenty of research before using any of these.
Here’s the list:
1. Alfalfa: Relieves digestion and is used to aid blood clotting. Contemporary uses included treatment of arthritis, bladder and kidney conditions and bone strength. Enhances the immune system.
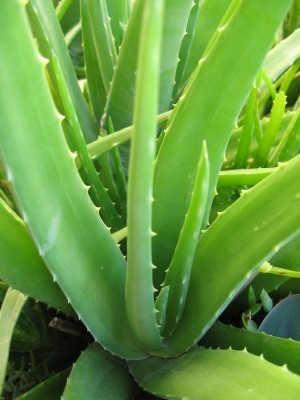
2. Aloe: A cactus-like plant. The thick leaves can be squeezed to extrude a thick sap that can be used to treat burns, insect bites and wounds.
3. Aspen: The inner bark or xylem is used in a tea to treat fever, coughs and pain. It contains salicin, which also is found in willow trees and is the foundation ingredient for aspirin.
4. Bee pollen: When mixed with food it can boost energy, aid digestion and enhance the immune system. If you’re allergic to bee stings you will most likely be allergic to bee pollen.
5. Beeswax: Used as a salve for burns and insect bites, including bee stings. Intended to only be used externally.
6. Blackberry: The root, bark and leaves when crushed and infused in a tea are used to treat diarrhea, reduce inflammation and stimulate the metabolism. As a gargle it treats sore throats, mouth ulcers and inflammation of the gums.
7. Black Raspberry: The roots of this plant are crushed and used as a tea or boiled and chewed to relieve coughs, diarrhea and general intestinal distress.
8. Buckwheat: The seeds are used in soups and as porridge to lower blood pressure, help with blood clotting and relieve diarrhea.
9. Cayenne: The pods are used as a pain reliever when taken with food or drunk in a tea. Also used to threat arthritis and digestive distress. It is sometimes applied to wounds as a powder to increase blood flow and act as an antiseptic and anesthetic to numb the pain.
10. Chamomile: The leaves and flowers are used as a tea to treat intestinal problems and nausea.
11. Chokecherry: Considered by Native American tribes as an all-purpose medicinal treatment, the berries were pitted, dried and crushed into a tea or a poultice to treat a variety of ailments. These include coughs, colds, flu, nausea, inflammation and diarrhea. As a salve or poultice it is used to treat burns and wounds. The pit of the chokecherry – much like apple seeds – are poisonous in high concentrations. Be sure to pit the cherries if you’re considering this for any use.
12. Echinacea: Also known as purple coneflower, this is a classic Native American medicine that is used to strengthen the immune system, fight infections and fever. It also is used as an antiseptic and general treatment for colds, coughs and flu.
13. Eucalyptus: The oil from the leaves and roots is a common treatment when infused in a tea to treat coughs, sore-throat, flu and fever. It’s used to this day as an ingredient in cough drops.
14. Fennel: A plant with a licorice flavor, this is used in a tea or chewed to relieve coughs, sore-throat, aid digestion, offer relief to diarrhea and was a general treatment for colds. It also is used as a poultice for eye relief and headaches.
15. Feverfew: Used to this day as a natural relief for fever and headaches – including severe headaches like migraines – it also can be used for digestive problems, asthma and muscle and joint pains.
16. Feverwort: Another fever remedy that also is used for general pain, itching and joint stiffness. It can be ingested as a tea or chewed, or crushed to a paste as a salve or poultice.
17. Ginger root: Another super plant in Native American medicine, the root was crushed and consumed with food, as a tea or a salve or poultice. Known to this day for its ability to aid digestive health, it also is anti-inflammatory, aids circulation and can relieve colds, coughs and flu, in addition to bronchitis and joint pain.
18. Ginseng: This is another contemporary herb that has a history that goes back across cultures for millennia. The roots were used by Native Americans as a food additive, a tea and a poultice to treat fatigue, boost energy, enhance the immune system and help with overall liver and lung function. The leaves and stems also were used, but the root has the most concentration of active ingredients.
19. Goldenrod: Commonly thought of today as a source of allergies and sneezing, it was actually considered another all-in-one medicine by Native Americans. As a tea, an addition to food and a topical salve, it is used to treat conditions from bronchitis and chest congestion to colds, flu, inflammation, sore throats and as an antiseptic for cuts and abrasions.
20. Honeysuckle: The berries, stems, flowers and leaves are used to topically treat bee stings and skin infections. As a tea, it is used to treat colds, headaches and sore throat. It also has anti-inflammatory properties.
21. Hops: As a tea it is used to treat digestive problems and often mixed with other herbs or plants, such as aloe, to soothe muscles. It also is used to soothe toothaches and sore throat.
22. Licorice: Roots and leaves can be used for coughs, colds, sore throats. The root also can be chewed to relieve toothaches.
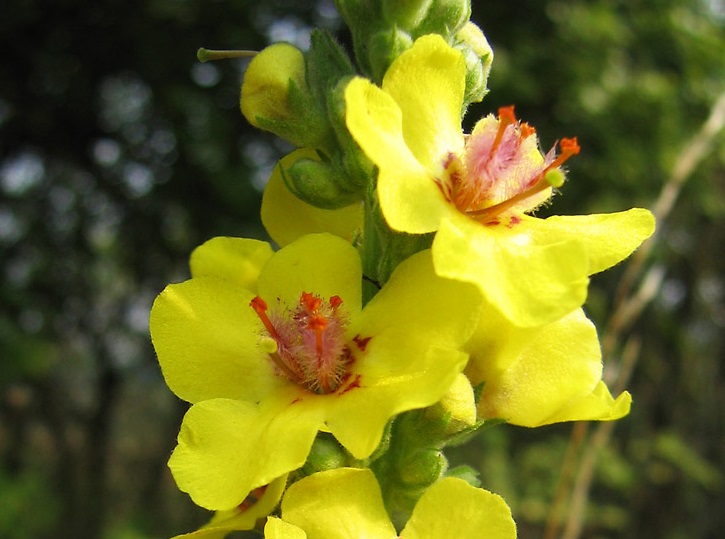
23. Mullein: As an infusion in tea or added to a salad or other food, this is a plant that has been used by Native Americans to treat inflammation, coughs and congestion and general lung afflictions. It is quite common and you probably have it growing in your backyard or somewhere close.
24. Passion flower: The leaves and roots are used to make a tea to treat anxiety and muscle pain. A poultice for injuries to the skin such as burns, insect bites and boils also can be made from passion flower.
25. Red clover: It grows everywhere and the flowers, leaves and roots are usually infused in a tea or are used to top food. It is used to manage inflammation, improve circulation and treat respiratory conditions.
26. Rose hip: This is the red to orange berry that is the fruit of wild roses. It is already known to be a massive source of vitamin C and when eaten whole, crushed into a tea or added to food it is used to treat colds and coughs, intestinal distress, as an antiseptic and to treat inflammation.
27. Rosemary: A member of the pine family and used in food and as a tea to treat muscle pain, improve circulation and as a general cleanser for the metabolism.
28. Sage: A far-reaching shrub across much of North America, it is a natural insect repellent and can be used for the standard list of digestive disorders, colds and sore throat.
29. Spearmint: Used consistently by Native American tribes for treatment of coughs, colds, respiratory distress and as a cure for diarrhea and a stimulant for blood circulation.
30. Valerian: The root as an infusion in a tea relieves muscle aches, pain and is said to have a calming effect.
31. White Pine: Ubiquitous and the needles and the inner bark can be infused in a tea. Used as a standard treatment for respiratory distress and chest congestion.
If you’re an expert on Native American cures I’m sure you can add many to this list. There are some excellent books on nature’s cures and the specific medicinal properties that Native American tribes discovered. Natural remedies are worth considering both from an historical and potentially practical point-of-view. Just make sure you identify them properly and check with your physician before using.
What would you add to the list? Do you believe Native Americans knew more about medicine than they are given credit? Share your thoughts and wite a comment below.
When you need to survive, your knowledge is your vital tool. Pine trees are one of the most recognizable types of tree and also a great resource for survival.
Master the ancient art of tapping a birch tree for sap and you’ll be rewarded with a sweet, refreshing and 100% natural thirst quencher.
Birch sap is a natural medicine. It looks like water but has a sweet taste with a lot of health benefits. You can forage it easily. So watch the video and then grab your billy and track down a birch tree!
In a survival situation, we want to stay stealthy. But you need to keep your body warm and cook your food. So you need fire. A fire will draw attention if someone is close. But the smoke can be seen from miles away. That’s why you want to learn how to make a Dakota fire hole. This technique will allow you to make a fire that only you can see!
Your best tool in a survival situation is your knowledge.
This 14min video is plenty of fantastic tips that could make you survive in the wilderness. Being aware of what is possible to do in such a hostile environment is essential.
If you want mother nature to cooperate with you instead of working against you, you must watch this short but useful video.
Watch this video until the end because I am sure there are some points that will help you in your life.