Survive The crisis


Leave a comment

How to Create a 72 Hours Bug-Out Bag

If a disaster occurs and you have to leave your home, it’s important that each member of your family has a bug-out bag (BOB) ready. In order to survive in this situation, you will need food, water and tools. Preparing a BOB can help you make it through the hardest and scariest times of a tragedy.There are certain elements of a catastrophe than you cannot control, such as power outages, fires, building collapses, or looting. But there are other things that you can do to give yourself a better chance of making it through those events (and others) alive.

A 72-Hour BOB is a bag you take with you when disaster strikes. To be effective, it should include several staple items. At minimum, you will need a gallon of water per day per person and some food. My recommendation is to use a pocket water filter like the LifeStraw. It allows you to filter thousands liters of water. When you know each gallon weights almost 9lbs, you undestand that your bag will be 27lbs lighter. That is a big difference when you have to walk for hours. And you can use the space to carry more items or food. But you should have some water in your bag in the case you can’t find water.

  • 1 water bottle 1l (full of water)
  • 1 Lifestraw or another pocket water filter
  • 2 collapsible bottles 1l (more containers for almost no weight and space in your bag)
  • 1 pump filter to purify a larger amount of water for cooking or storing
  • 10 purifications tablets (better to have a different way to purify your water)

728x90_LifeStraw_4

The food must be non-perishable such as canned foods and juice, rice, pasta, dried beans and peas, granola bars, dried fruits or trail mix. It’s best if any canned items have “pop-tops” that don’t require a can opener, but if you can, bring one with you just in case. Remember that you have one in your multitool. A vital item you must have is a metal cooking pot. It’s a survival tool for many people in third world countries. You need a container to prepare enough food for you and your family. It’s the same for boiling water. Here is a list of what you can bring in your BOB.

  • 1 metal cooking pot
  • 6 granola/energy bars
  • 1lb rice or pasta and 1lb dried peas or beans (needs water to be prepared but you’ll feel better to eat something ”normal”)
  • Trail mix
  • Dried fruits
  • 3 MREs/Dehydrated meals
  • Canned juice
  • Canned food
  • Sugar, salt and pepper in a small container
  • 1 Can opener
  • 1 Portable stove
  • Stove fuel (8 tablets)
  • 1 pot scrubber
  • 1 spork
  • 1 Fishing kit
  • A Snare

You will also need fire and/or a cooking device like a backpacking stove with some fuel. My tip is to make petroleum jelly cotton balls fire starters. Watch the video below. This will allow you to easily start a fire wherever you are, even if everything is wet.

  • 2 fire starters (I love the Fire Laces because I can bring more fire starters on my shoes!)
  • 1 lighter
  • 10 wetfire (you don’t know how will be the weather when you’ll need to start a fire)
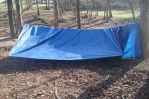
Fire-Laces_728x90_2
An other important thing is a shelter. I don’t think a tent and a sleeping bag is the better choice because it takes space. I prefer to use multipurpose items like a tarp and a wool blanket. Let me explain why. Wool is the only material that will keep you warm even if it’s soaked. That’s a huge benefit your sleeping bag doesn’t have. And you can use it like a cape. The tarp can be used to collect water or as a big bag. And I am sure you will find other functions to these items in a survival situation…
  • 1 tarp 6’x8′
  • A 100% wool blanket
Light and communication are the next crucial tools you must have in your BOB. The need to see at night, find your path, move or identify is very important in a survival situation. In case of emergency, it’s a great asset to be able to gather informations and communicate with your group. A walkie talkie is perfect. A small radio/alert clock is a great tool. It allows you to be informed (if it’s still possible) but also set alarms when someone must stand guard and stay awake. Don’t forget that you need batteries to run your devices.
  • 2 glow sticks (excellent when you move at night)
  • 1 head lamp (perfect to work with both hands and still have light)
  • 1 good Pocket torch
  • 1 weaponlight 170 lumens (very important to identify a potential target, 170 lumens is also a weapon because it dazzle your ennemy)
  • 1 small radio
  • 1 walkie-talkie
  • Batteries (lithium are better)
  • Solar Air Lantern (I love it because it’s small and solar powered… perfect for a survival situation!)
 Luci-LanternBanner3
Then you need a personal kit with your ID, at least 100$ and some silver coins. It will be easier to trade if there is a problem with the dollar. But all your efforts will be worthless if you don’t prepare to defend yourself. If you want to survive, it’s better to avoid conflicts but sometimes you will have to fight for your life. Here is what I recommend:
  • 1 pepper spray (not the most effective weapon but it can do the job in certain siutations)
  • 1 Glock 19
  • 3 magazines
  • 100 Hydra-Shok bullets
 If you are in this situation, you will also need to find your bearings. Here is a list of what you should have:
  • Local maps with topography
  • A compass
  • A whistle
  • Binoculars
A BOB is not complete without a first aid and a protection kit. The probability of an injury is high in a survival situation. That’s why you need to protect yourself to reduce that risk. If you leave home for 3 days, it’s important to have clean clothes.
  • 1 pair of work gloves
  • 1 first aid kit
  • 1 soap
  • Winter gloves
  • A woolly hat (will keep your heat even if it’s wet)
  • 1 Wool socks
  • 1 Underwear
  • 1 fleece
  • 1 Tee-shirt
  • A windbreaker jacket with a hood
  • 2 battledresses

Here are some other important items to add to your supply. If you can carry more, include whatever other items you think will be necessary for your survival.

Extra undergarments
Blankets
Batteries
A flare
Flashlights
Some candles
Wooden matches in a water-proof container
A pocketknife
Rope
Duct tape
Batteries
Baggies (to keep items dry)
A crank or battery powered radio
Moist towelettes and/or hand sanitizer (for hygiene)
Important health and personal documents

Always be prepared!

Build The Ultimate Survival First Aid Kit

first-aid-908591_960_720


Leave a comment

Build The Ultimate First Aid Kit

Building a first aid kit is one the first thing you should do to prepare for a SHTF scenario. If you don’t have one, I really recommend you to start as soon as possible. These videos will help you to build the best survival first aid kit. This man is a former fire medic EMT so he knows what he is talking about. This video show you exactly the items needed to put together the ultimate first aid kit.

SurvialFrog_MiniSale_728x90


Leave a comment

How to Make Soap in a Survival Situation

Most of the people who are in a survival situation, do not think about hygiene at all. But the main point is that it is really important because if you keep your body clean, you can avoid all the diseases and infections. These ailments can kill you or make your life tough in that situation. Another thing to note here is that making through the survival situation is not that tough as you might think. Importantly, you would be requiring your material used in usual survival activities like grease, ash or animal fat.

UCAffiliateCreative (5)

Making soap in survival situation

One of the most common way to make a cleaner is to mix wooden ash into grease. This method is really quick and easy to make. The only problem here is that the cleaner which will be formed can be used to clean kitchen utensils, tools etc. and is not suitable to use on human body. So if you want to create homemade soap while using the common material you find in the wilderness, follow the below mentioned steps
1. First you have to start with removing pearl ash (which is a purified version of potash) or potash itself, which are basically different forms of potassium based alkali present in wood material or plants. You can do this by leaching. Next you need to make a container having small holes present in the bottom
2. Form the first layer by placing small gravel. This layer will form at the bottommost part of the container
3. Then above the layer of gravel, place sand or straw. Basically the use of sand or straw is because they function as a filter. Do not worry, if you cannot find them, you can use any kind of filter
4. Now you would have to fill the rest of the container with the ashes. These ashes have to be of a cooled campfire which makes it easy to obtain.
5. Now you have to place a cooking container below the first container so that you catch the runoff.
6. Start now with pouring about a gallon of water onto the ashes. Doing this will allow the brownish-grey water (also called lye) to pass through the hole present at the bottom of the container. Then it will pass on to the second water underneath the first. You should pour slowly, like 2, 3 ounces in a minute. Do note that if the ashes have started to swim, then you should slow down the pace of pouring. During the leaching process, if you notice that lye is losing colour, then you can add more ash too.

UCAffiliateCreative (1)
7. After this boil the lye water using the cooking container. It should be done until half of the water has been evaporated. The mixture thus formed may froth or foam. Small bubbles will also rise from the sides of the pot. The solution thus formed is called potassium carbonate or potash
8. Now add grease, animal fat and half a cup lard to the boiling mixture and keep cooking for about 30 minutes. Note that if you are using animal fat (which could be the case if you are making soap in the wilderness, and that is the most easily available option) then do ensure that it is free meat, blood or food particles. But if the animal fat is not pure, then it may spoil the soap in the drying process.
9. Now it’s time to place the mixture into molds. Do not worry about the shape of the mold as it does not matter. You can use a deep dish or wooden mold carved from tree wood would also do. Large mold can also be used and once the soap is hardened, cut the bars into pieces.
10. Leave the mixture to dry for 1-2 days. After that remove the soap from the mold.
11. If you have used larger mold, cut it into pieces
12. Now you need to place the soap in a well ventilated area for about 10-14 days. If you have a lot of soap bars, it is better not to stack them up but to lay them which would help in the drying process.

Additional notes to be taken in consideration

Animal fats used in soap making process
You can clean the animal fats used in the soap making with a process called rendering. With this process you can remove all the animal meat tissue which surrounds the animal fat. Add the fats (chopped into small pieces) with cooking grease in a container having a small amount of water. Do not stop boiling the mixture until all the fats and grease is completely melted. Now remove the mixture from boiling and add more water to it. Let the solution cool overnight and the next day you will see all the animal fat solidified at the bottom of the container. That layer would be a clean layer of fat.

survival manual
Softness and hardness of resulting soap
After the whole soap making process, if the resultant soap is too soft then you can put more salt on top of it. Once you do that, the soap will absorb the water and will harden it, giving it the texture similar to the commercial soaps. Another thing to consider here is that the type of water which you use in the soap making process also determines the end product. If you use rain or spring water, then it would be a best case scenario as they do not contain any acidic chemicals or metallic substance present. You can also use river water but for that you would also require baking soda or salt to harden the soap.
Making the soap smell good
You can make your soap smell good by adding natural fragrances to it. For example you can use wintergreen or oil squeezed from lavender which would make the soap smell as the commercial soap. Another substances which can be used are lemon juice or vinegar which can make the soap free of any kind of pungent or undesirable smell
Other uses of lye water
You can also use lye water to sanitize latrines and outhouses as it kill the bacteria and it would be quite beneficial when you are in the wilderness.

How to Purify Water When You Have Nothing

Sun


Leave a comment

DIY Antibiotics (Make it at Home)

Yes, you can make your own anti-biotics at home. I’ll show you how to make a really super powerful one (it’s easy to do). Anyone can do it. Most people will want to do this in their backyards or on a patio. But I suppose you could do it indoors too. This one I’ll show you how to make is way more complex than anything the pharmaceutical companies can produce, yet it is simpler and easier to make. No, you won’t need a lab of chemistry set. No, you won’t need microscopes or chemicals. Nope, you won’t even need a spectrum analyzer….

This is so simple it’s just amazing you aren’t doing it right now.

This particular anti-biotic not only helps boost your immune system for any time you have an infection, but it is also good for when you have a cold, it’s known to help lower cholesterol and high blood pressure, it’s been known to help balance blood sugar, fight cancer, fight fungus, and more.

If you want to learn, register to the Home Grown Food Summit.

summit

31 Ancient Native American Remedies

indian


Leave a comment

Survival Frog Paracord Grenade Review

You won’t believe what all is packed inside this paracord grenade kit.

Byron-Walker_paracord-Grenade_300x250_09

Buy Paracord Grenades Now!


10 Coolest Paracord Survival Bracelet

waeve


Leave a comment

5 Ways to Use Paracord For Survival

If you are not still convinced that paracord is preppers’ best friend, I am sure you will after seeing how it can be used in a survival situation. It is easy strong, versatile, inexpensive, lightweight and easy to carry with you where you go. This is why paracord survival bracelets are so popular.

Must See: Get a FREE FireKable Paracord Pracelet

Here are 5 ways how you can use paracord for survival.

1. Paracord Tent Rigging

With some paracord and know how, you can turn any ordinary tarp into a makeshift shelter.
For the full DIY, click here.

tent

firecakble

2. Paracord Snare Trap

This easy snare trap will help you catch small game and eat in a survival situation. The instructions and tutorial will show you how to create a basic snare with paracord and sticks that will increase your probability of catching something in the wild.

paracord-snare-trap16

For more, check out the full DIY!

3. Paracord Backpack Strap Wrap

Up the durability of normal pack straps by this addition of a paracord wrap. The Paracord Strap Wrap is a simple way of tidying up loose ends on your gear using various lengths of paracord. Using paracord instead of things like cable ties has its obvious advantages to any paracord fanatic.

backpack
Depending on the amount of the strap you want to cover and the thickness you want to make it you can use anywhere between 2 or 3 meters up to 15. Full instructions.

4. Paracord Bandoiler

Keep your ammo neat and orderly with this easy DIY.

bullet

It’s always a good idea to bring a length of paracord when you go to the wilderness. Lighten your pack by leaving the ammo boxes at home and hold your ammunition with this paracord bandoiler. Full instructions.


5. Paracord Rock Sling

Never run out of ammo with this paracord slingshot. This DIY backup weapon doesn’t need bullets or arrows.

woven-rock-sling-1024x545

The sling is one of the easiest ranged weapons you can make. Because of that, it is popular. It has been used since ancient times for hunting and even in warfare. Instructions here.

BONUS VIDEO

Don’t miss out the 10 Coolest Survival Paracord Bracelet

waeve


Leave a comment

Survival Tip: Make Food from Pine Trees!

When you need to survive, your knowledge is your vital tool. Pine trees are one of the most recognizable types of tree and also a great resource for survival.

Check out the video below to know more.

FS-250-250-a


Leave a comment

The Dakota Fire Hole – Stealth Fire

In a survival situation, we want to stay stealthy. But you need to keep your body warm and cook your food. So you need fire. A fire will draw attention if someone is close. But the smoke can be seen from miles away. That’s why you want to learn how to make a Dakota fire hole. This technique will allow you to make a fire that only you can see!

unnamed

How to Make a Fire in Wet Weather

wetfire


Leave a comment

Wet Weather Fire-Making – HowTo

In this video you will learn how to make a huge fire that will last all night long, especially in wet weather!

625x400

Learn to Create Fire with Friction

Fire


Leave a comment

Creating Fire with Friction

Learn from Jessie and Jane as they show how to create fire through friction.

In just over three minutes, they show how you can create fire from two pieces of wood, a bow, and some dry grasses or straw.

625x400

Learn to Make Fire by Rubbing Sticks

fire stick